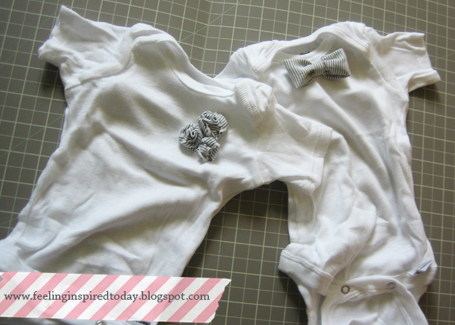
this weekend, i have two baby showers to attend.
one for a baby boy.
one for a baby girl.
i got them the usual from-the-registry-gifts.
but, i wanted to add a little something with a handmade touch.
so, i made these cutie-pa-tooties:
baby stuff is just so precious.
gets me every time.
the rosettes i've seen done via the internet.
the bowtie i made up on my own.
i actually saw an iron-on tie for a baby boy online,
but i figured out this bowtie on my first attempt.
hooray for me!!
who doesn't love a baby with a bowtie on? :)
let's start with the bowtie:
1.) Start with a fabric piece that is 5.5w x 2.5h. Thicker fabric is better:
4.) Flip over. This is the front:
5.) Cut another piece of fabric that is 1" x 2" (you'll cut most off the 2"). This is for the middle of the bow:
6.) Fold lengthwise to meet in the middle. It should be now a little more than 0.25":
7.) Hot glue on end to the back of the bow and bring it around to the front:
8.) Make it really tight and "scrunched"-looking. Hot glue on the back and cut off the excess fabric.
9.) Hot glue the bow to the onesie, just under the collar "lip". Keep your hand behind the fabric and press, so the hot glue doesn't bleed through that first layer.
now for the rosette tutorial, my dears...
(you'll have to excuse some of the blurry photos.)
1.) Cut 3 strips of fabric 3", 8" and 11"high and all 1"wide. (I snipped the fabric and tore up for a frayed edge:
|
|
3.) Twist the fabric and add a dab of hot glue for a "petaled" look. Twist again and again. Use a dab of hot glue with each twist. (It doesn't have to be perfect, you can "adjust" later.):
4.) Secure the end of the fabric on the back. Here is a blurry example: (sorry!)
5.) This is the finished product. I usually add dabs of glue here and there to adjust it accordingly to look more like a rosette:
6.) Attach all three rosettes using hotglue. Keep your hand behind the fabric and press, so the hotglue doesn't bleed through that first layer of fabric:
all done! supercute, right?
the instructions look extensive, i know.
but, it's REALLY simple.
i'd estimate about half hour for the entire project.
no sewing + easy on the pocketbook.
happy friday, loves!


No comments:
Post a Comment